Custom Cat Carrier: OEM Production Process
A custom cat carrier moves from approved brief to loaded container in fourteen controlled stages. Sample production alone takes 6-10 working days, bulk runs 35-50 days, and the operationally decisive stages are material qualification before cutting, tether anchor construction during sub-assembly, and functional escape testing before pack-out - not the sewing itself.
This document describes what physically happens to a custom cat carrier order between the moment a specification is signed and the moment a container clears the gate, written in process order with the gate, the owner and the evidence produced at each step. It is aimed at brand teams who need to plan a launch date and at buyers who need to know where delays originate. The sequence is presented as it actually runs in a pet sewn-goods facility of the kind used for this category: the SGS-verified production base that supports these programmes occupies 4,950 m² with 149 machines across seven lines and a 137-person team, producing pet carriers and bags since 2014 under BSCI and ISO 9001 systems, with monthly capacity near 200,000 units. Standard commercial terms apply at every stage: MOQ 500 pieces per colourway, prototypes in 6-10 working days, bulk production 35-50 days after sample approval, final random inspection to AQL 2.5, T/T 30/70 and FOB Xiamen.
A dog carrier manufacturer is expected to hold the cat carrier pattern card for at least twelve months, so a reorder matches the approved sample rather than drifting.
Stage One: Brief Intake and the Tech Pack
Everything downstream inherits its errors from this stage. The brief is the commercial intent; the tech pack is the engineering translation, and the translation step is where abstract requirements either become measurable or get lost. A well-formed tech pack for this product runs fifteen to twenty-five pages and is treated as a controlled document with revision letters.
Its contents follow a fixed order: a cover page with the programme reference and revision history, a materials bill naming every component to specification, a colour way page with physical reference chips rather than screen colours, dimensioned component drawings with tolerances, an exploded assembly drawing showing operation sequence, a construction sheet describing every seam type and stitch density, a hardware schedule with finishes and plating specifications, artwork and label placement with dimensions to the millimetre, packaging specification, and finally the acceptance criteria page.
Two items on that list are the ones commonly shortchanged. The seam specification usually reads simply as "strong seam", which no operator can interpret; it should state seam type by classification, stitch density per inch, thread ticket number and needle size, because those four numbers together determine seam strength and they are all independently verifiable with a ruler and a seam ripper.
The acceptance criteria page deserves its own paragraph because it resolves every later argument. It should list each requirement with the method and the numeric tolerance that demonstrates compliance, including escape resistance, floor deflection, ventilated open area per face, colour fastness grades, tether anchor load and the dimensional tolerance band. When a disagreement arises in week fourteen, this page decides it.
Revision control matters more than most teams expect. Product development routinely produces three to six iterations, and once sampling begins each revision changes clicking dies, pattern pieces and sometimes tooling. The correct practice is a frozen revision letter referenced on the purchase order, with any later change issued as a written engineering change note carrying its own cost and schedule effect.
Stage Two: Material Qualification Before Any Cutting
Material qualification runs parallel to sampling and must be complete before bulk cutting begins, because it is the longest lead-time element after tooling and the most disruptive to discover late. It covers five material families, each with its own evidence requirement.
Shell textile qualification starts with a lab dip or a submission swatch against the approved reference under standardised lighting, assessed for shade and for texture match. Beyond colour it requires confirmation of finished mass, coating type and weight, tear and tensile strength, coating adhesion and colour fastness to rubbing and to washing. Results should come from an accredited laboratory report rather than from a mill data sheet, since the two diverge more often than anyone admits.
Hardware qualification covers zippers, buckles, rings, feet and any moulded part. Zippers require chain type verification, slider type and finish, pull strength tested on the assembled tape, and cycle durability testing. Buckles and rings need a stated breaking load and, where used as structural elements, a salt-spray result for plated finishes. Every plated item should carry a defined salt-spray duration and acceptance rating.
Internal components - boards, trays, foams and paddings - are qualified for thickness tolerances, density and compression set. Foam density is frequently misrepresented, so the specification should state density in kilograms per cubic metre plus indentation load deflection, and incoming verification should weigh a known volume rather than trusting a label.
Chemical screening serves the destination market. Restricted substance testing for coatings and textiles, heavy metal screening on hardware and prints, and any specific declarations required by destination jurisdiction are all submitted at this stage, typically taking two to four weeks from submission to report. Textile screening is normally run against OEKO-TEX criteria and any applicable done accordingly. This block on the schedule is the reason buyer teams should not plan a launch date shorter than fourteen weeks from a clean brief.
Stage Three: Pattern Development, Grading and Markers
Pattern making converts the drawing into physical pieces that assemble into a three-dimensional shape reliably on a line rather than once in a sample room. It proceeds in three steps: base pattern, grading and marker.
The base pattern is derived from the dimensioned drawing with allowances added for seam, turn and tolerance accumulation. Allowance discipline is what separates a professional pattern from an amateur one: every dimension in the drawing needs the accumulated allowance schedule made explicit, because a 3 mm seam allowance on four panels is a 12 mm change to an interior dimension, which is a meaningful fraction of the clearance available in a cat compartment.
Grading handles size scaling where the range has more than one size. Cat programmes usually run one or two sizes, and the scaling is not uniform: interior height scales differently from length because the animal's proportions do not scale linearly, and base board thickness steps in discrete increments rather than proportionally. Grading rules for this category therefore tend to be hand-set per dimension rather than generated by a uniform grade rule.
The marker is the nesting layout of all pattern pieces across the fabric width, and it determines material consumption. Marker efficiency for a mid-size cat carrier typically lands between 78% and 88% depending on panel shape complexity and on whether stripe direction or print repeat constrains placement. Every point of efficiency is roughly 2-3% of fabric cost per unit, which is why pattern review is worth a day of attention on a programme of ten thousand units.
Digital cutting or die clicking follows from the marker decision. Die clicking suits volume above roughly 2,000 units per pattern, offering repeatability and speed; below that, single-ply digital cutting avoids die costs and allows late revisions. Both routes are common in this product range, and the decision belongs to the quotation stage rather than to production week.
Stage Four: Cutting and Panel Preparation
Cutting is short in duration and disproportionate in consequence, because every subsequent operation inherits its dimensional accuracy. A panel cut 2 mm out of tolerance produces a seam that either puckers or bridges, and no amount of operator skill downstream repairs that.
Preparation begins with spreading, and the two control variables are tension and alignment. Fabric must be spread flat without stretch, particularly for coated textiles that recover slowly, and it must be relaxed for twenty-four hours after unrolling on coating-heavy constructions. Panel count per lay is limited by the capacity of the cutting method and by the height at which blade deflection becomes measurable.
After cutting, every panel is bundling-tagged with programme reference, size, colourway, lay number and piece reference. This tagging discipline is unglamorous and essential: mixed shade panels within one product are visually obvious on a sewn assembly and cannot be repaired, and the only control that reliably prevents it is bundle-level identification verified by the line operator before each operation.
Numbering and matching complete preparation. Panels to be assembled together must come from the same lay to avoid shade drift, so sequential numbering within each lay and bundle pairing are standard. For printed or patterned textiles this extends to placement of the motif relative to pattern references, which needs a placement template rather than operator judgement.
Cutting waste is not simply lost material; it is also a traceability decision. Offcuts from coated constructions and from panels carrying a printed motif need to be separated at the table, because they cannot be reintroduced into another lot and their composition cannot be confidently declared. Marking each bin output by programme reference keeps the material ledger honest and simplifies any later question about what went into a given batch.
Finally, first-piece verification: before a bundle is released to line, the first piece from each lay is checked against the pattern template and against the acceptance tolerance, typically plus or minus 2 mm on major panels. Only then does the bundle move. Fusing or reinforcement application - interfacing, webbing anchors or stiffener patches applied before assembly - normally happens here rather than on line, because it is a heat and pressure operation better executed flat.
Stage Five: Sub-Assembly and the Closure Line
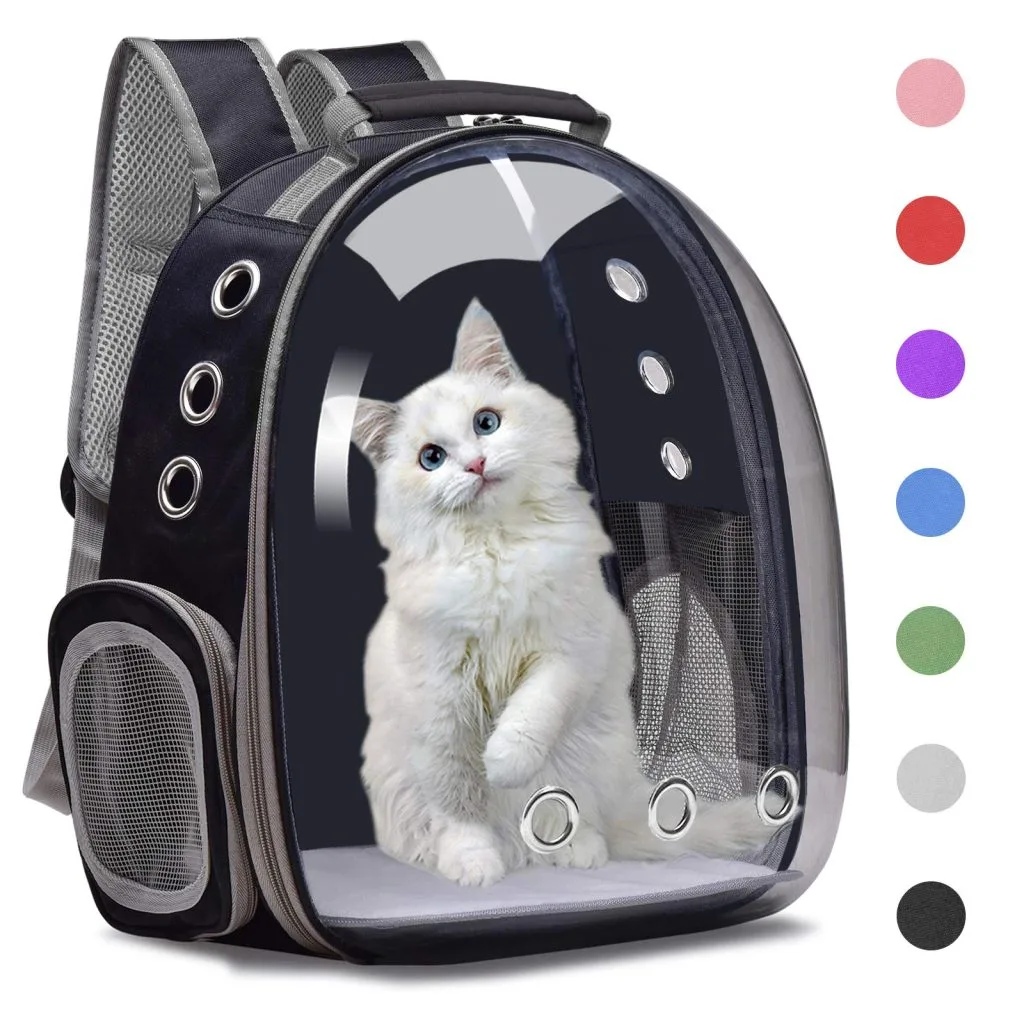
Modern sewn assembly rarely runs the whole product through one operator. Work is split into sub-assembly cells feeding a final line, and for this product the closure sub-assembly is where the cat-specific risk concentrates.
Zipper sub-assembly builds the panel-plus-closure unit off line. It requires a jig, because a zipper set freehand will wander, and any wander translates into unequal teeth engagement and hence into a slider that catches. The jig holds tape, panel and any storm flap in a fixed relationship; the operation then runs identically every unit. Slider insertion follows, with the locking mechanism function-checked by the operator before the unit leaves the cell.
The escapement control elements are added here. A reverse-coil chain with a locking slider is the base protection; in addition many constructions use a secondary restraint, either a snap hook through the slider pull or a tab locked over it, which prevents a partially opened slider travelling under internal load. Each of those additions is a discrete operation that must be function-tested rather than visually checked.
The interior tether anchor is the second critical sub-assembly, and it is the one most often built incorrectly. A ring or webbing loop is not an anchor: the load path must continue from the ring through a webbing extension onto a stiffener or frame element, and then distribute across the panel. Standard construction carries the extension at least 120 mm beyond the ring, box-stitched over a minimum 40 x 40 mm pattern onto a reinforcement patch backed by 2 mm board, and the finished anchor is tested.
Webbing and strap preparation form the third cell: cutting lengths, sealing ends with a hot knife to prevent fraying, folding and bar-tacking at load points. Because straps carry the entire weight in use, bar-tack placement follows a written dimension from the tech pack, and each bar-tack is visually verified rather than counted. Wrongly placed bar-tacks produce strap failure at load, which is a safety defect rather than a cosmetic one.
Stage Six: Main Line Balance and Assembly Sequence
Main assembly sequences the remaining operations into an order that can be completed by available labour without handling the product unnecessarily. The line is balanced so each operation takes similar time, and the target each operator handles the unit once.
A typical sequence for a soft cat carrier begins with ventilation panel insertion, then the floor board insertion and closure of the base seam, followed by side panel joining, top panel and compression strap, then binding of raw edges, then final turning, then hardware attachment, then finishing and trim. Each step has a standardised work instruction posted at the station with photographs of acceptable and unacceptable outcomes.
Sewing parameters are set per material, and this is where experienced production teams earn their fees. Needle size must suit fabric thickness else it deflects and skips; thread must suit both the needle and the seam load; stitch density typically sits in the range above six per inch for load-bearing seams and higher where a seam crosses itself; and presser foot pressure must be low enough not to mar coated faces. A single parameter set wrongly produces a seam that passes inspection and fails in the field.
Changeover discipline belongs to the same discussion. A line running several colourways in one week will change thread cones, webbing rolls and sometimes needle size between runs, and every change is an opportunity for the wrong component to enter the wrong unit. Written changeover checks, verified by a second person rather than by the operator alone, cost a few minutes per colourway and prevent an entire class of defect.
Difficult operations in this product are known to every production engineer in the category. Binding around a formed corner requires relief cuts precisely placed. Topstitching over a seam crossover needs a compensating foot or a shim. Attaching webbing across a panel already containing stiff board requires sequencing before board insertion, otherwise the machine cannot clear the thickness. Each of these should have been rehearsed in the pre-production trial rather than discovered on day one of bulk.
Presser foot and thread path settings deserve more attention than they usually receive, because incorrect settings produce defects that appear only in service. Too much presser foot pressure crushes coated faces and leaves permanent marks that show as shade variation; too little lets the feed layers shift relative to each other, producing a seam that looks correct and has elongated needle holes. Thread path resistance should be adjusted with the operator watching the stitch formation under load rather than on a test scrap.
Simplification is the last discipline of the stage. Every seam added to a construction adds an operation, a potential failure point and a few cents, and engineering review of line balance frequently identifies two operations that can be combined into one fold-and-topstitch step. Removing an operation is usually worth more than any procurement saving obtained by chasing material price.
Line balance itself typically splits into fifteen to thirty operations for a mid-complexity carrier, with takt time in the several-minute range. Excess work-in-progress hides problems rather than solving them, so inventory before each station is capped deliberately at two to three units. Method references for seams and closures follow practices published by ASTM International, and quality system framing follows ISO 9001.
Stage Seven: In-Process and End-of-Line Controls
Quality is not inspected in at the end of this product; the end inspection only samples the result. Four control layers operate during production, each catching a different defect class.
Incoming verification examines materials before issue: dimensional check of boards and trays, weight check of foams against specified density, visual shade verification against the reference under standardised light, and functional check of zippers and buckles sampled per lot. Catching a wrong board thickness here costs nothing; catching it after assembly costs the whole unit.
First-piece approval runs at the start of every shift and every style change. The first complete unit, or the first two units, are fully measured against the tech pack before the line is released. This catches tool drift, wrong pattern templates and operator misunderstanding within the first minutes of production instead of at the hundredth unit.
Patrol inspection samples mid-process output every one to two hours across every station rather than only at the end, focusing on the operations with the highest defect risk: zipper setting, binding, webbing bar-tacks and tether anchors. Results are recorded against station and operator so that trends are visible before they become failures.
Functional testing at end of line covers the characteristics with zero acceptance. Closure function is checked on every unit, tether anchors are pull-checked, needle detection with equipment sensitivity verified at defined intervals against test pieces, and every unit is visually reviewed for binding integrity and loose threads. Only then does the unit reach packing.
| Control layer | Frequency | Principal catch | Record produced |
|---|---|---|---|
| Incoming verification | Per lot | Wrong thickness, density or shade | Material release note |
| First-piece approval | Per shift and style change | Tool drift, wrong pattern | Signed first-piece card |
| Patrol inspection | Every 1-2 hours per station | Operator and method drift | Station defect log |
| End-of-line functional | 100% of units | Closure, anchor, needle hazards | Daily functional record |
| Final random inspection | Per shipment | Commercial acceptability | AQL 2.5 report |
Stage Eight: Packing, Inspection and Release
The final stretch looks administrative and determines whether a good production run reaches the customer undamaged. Three activities run in sequence: packing, final random inspection and documentation.
Packing starts from the packaging specification written at stage one, which should state folding method, protective interleaving, unit packing, master carton quantity, carton specification and drop-test survival requirements. Carriers are bulky and easily creased, and any shell with a coated face or a printed panel requires interleaving tissue or a poly sleeve. Carton quantity is chosen from the dimensions rather than from a round number, because a partially filled carton is a damage risk.
Final random inspection samples the shipment to AQL 2.5 for major defects with minors set more loosely, using general inspection level II single sampling against the acceptance criteria written at stage one. Critical characteristics are not sampled; they were verified 100% at end of line, and their records are re-reviewed here rather than re-tested. A failed inspection triggers containment and corrective action.
Documentation closes the shipment. The standard set comprises commercial invoice and packing list, certificate of origin where required, bill of lading or airway bill on issue, any destination-specific declarations, the inspection report, and where applicable — declarations or test reports referenced in the material qualification pack. Balance payment is released against documents under T/T 30/70 terms, with loading FOB Xiamen.
Then the process repeats. Programmes that treat an eight-stage cycle as a routine rather than a project achieve bulk runs inside the standard 35-50 days with predictable repeat cost; programmes that reinvent the process each season do not. For adjacent reading see bulk production timelines and the pieces discussing FOB shipping terms from China. The process is not complicated, but it is strictly sequential, and every shortcut taken at an early stage is paid for twice at a later one.
Order and quality terms
- MOQ 500 pieces per colourway; samples in 6-10 working days
- Bulk production 35-50 days after approval; AQL 2.5 inspection standard
- T/T 30/70 terms, FOB Xiamen, full document set per shipment
People Also Ask
How long does custom OEM production of a cat carrier take?
Fourteen to eighteen weeks end to end, with samples in 6-10 working days and bulk in 35-50 days after golden sample approval. Material qualification and tooling, not sewing, set the critical path.
What should a tech pack specify about seams?
Seam classification, stitch density per inch, thread ticket number and needle size. Those four numbers determine seam strength and each can be verified independently by anyone holding a ruler.
Why is zipper setting done on a jig?
A zipper set freehand wanders against the panel, producing unequal tooth engagement and a slider that catches. The jig fixes tape, panel and flap relative position so every unit is identical.
How is a cat tether anchor properly built?
The ring is not the anchor. A webbing extension runs at least 120 mm past the ring, box-stitched over 40 x 40 mm onto a reinforcement patch backed by 2 mm board so load reaches the frame.
What is marker efficiency for a cat carrier?
Typically 78-88% depending on panel complexity and print constraints, and each point of efficiency is roughly 2-3% of fabric cost per unit, which is why pattern review pays at volume.
Which characteristics get 100% checking rather than sampling?
Closure function, tether anchors, needle detection and any feature that could create an escape path or a hazard. These are outside the AQL sampling plan entirely.
What documents close a shipment?
Invoice and packing list, certificate of origin where required, bill of lading, any destination declarations, the inspection report and applicable declarations, released against documents under T/T 30/70.
Frequently Asked Questions
How many pages should a complete tech pack be?
Fifteen to twenty-five, covering materials bill, colourway chips, dimensioned drawings with tolerances, exploded assembly, construction sheet, hardware schedule, artwork placement, packaging and acceptance criteria under revision control.
Why should the acceptance criteria page be written first?
Because it resolves every later disagreement. It lists each requirement with the test method and numeric tolerance that demonstrates compliance, and it is referenced when bulk is assessed fourteen weeks later.
What does material qualification cover?
Five families: shell textiles verified for finished mass, coating, strength and colour fastness; hardware verified for chain type, breaking load and salt-spray; internals verified for density; chemical screens; and all of it evidenced by accredited laboratory reports.
Why check foam density by weighing rather than by label?
Density is the most commonly misrepresented figure in the substrate supply chain. Weighing a known volume takes seconds and detects substitutions that a mill data sheet never will.
How long does chemical screening take?
Two to four weeks from submission to report, which is why screening runs parallel to sampling and why a launch schedule shorter than fourteen weeks from a clean brief is unrealistic.
Why do seam allowances compound into interior dimensions?
Because every panel contributes them. A 3 mm allowance across four seams is 12 mm of interior change, which is a meaningful fraction of the clearance available inside a cat compartment.
How long does fabric need to relax before cutting?
Around twenty-four hours after unrolling for coating-heavy constructions, so that the textile recovers its dimensions before the lay is made and panels do not shrink after assembly.
What identification control prevents mixed shade panels?
Bundle tagging with programme reference, size, colourway, lay number and piece reference, verified by the operator before each operation, since mismatched panels cannot be repaired after sewing.
What tolerance applies to cut panels?
Generally plus or minus 2 mm on major panels, verified on the first piece from every lay against the pattern template before the bundle is released to line.
When should webbing be attached in the sequence?
Before stiffener board insertion, because a machine cannot clear the combined thickness afterwards, and bar-tack placement must follow written dimensions from the tech pack rather than operator judgement.
How many operations make up the main line?
Usually fifteen to thirty for a mid-complexity carrier, balanced to even takt time with work-in-progress capped at two to three units per station so that problems surface rather than being buried.
What is the typical stitch density for load-bearing seams?
Above six stitches per inch, higher where a seam crosses itself or where higher peel loads occur, always stated together with thread ticket and needle size as a single parameter set.
How is the master carton quantity chosen?
From the dimensions of the packed unit rather than from a round number, because a partially filled carton collapses under stacking load and damages product that packed correctly.
What happens when final random inspection fails?
The lot is contained pending root cause, a corrective action is issued with owner and date, and verification is carried out on the following shipment rather than assumed from paperwork alone.
Talk to QUANZHOU JUNYUAN BAGS about a pet carrier program: MOQ 500 pieces per colourway, samples in 6-10 working days, bulk production in 35-50 days under AQL 2.5 inspection.
Get a free quote Request a sample